Steam remains a firm favorite among much of the PC gaming community. The large number of titles available, the overall design of the platform and the solid reliability offer an unparalleled user experience. When compared to other popular options available, Steam reigns supreme.
Many people use Steam to take screenshots. In this article, you will learn how to back up your Steam screenshots both to the cloud and locally to your computer. We'll also show you how to move your locally saved Steam screenshots to another PC without losing their metadata.
Download: Steam for Windows | Macs | Linux (free)
Backing up your screenshots to the Steam Cloud is simple. First, open Steam and navigate to Settings selecting the tab, Steam, in the upper right corner of the screen. Then select In Game of the available options. This menu will display your current hotkey to take a snap in game. Also, it gives you the option to change your default Steam screenshot folder.
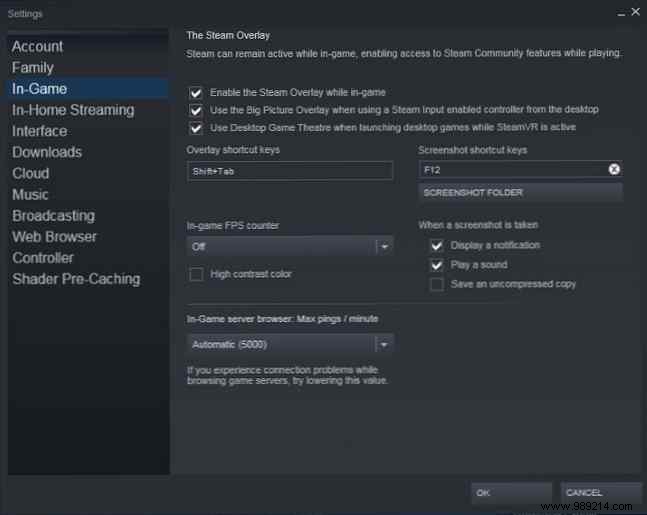
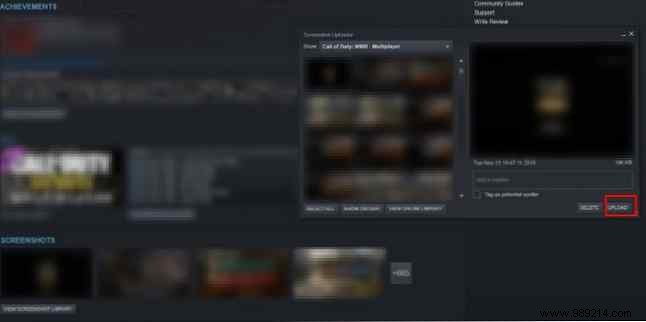
Now that you understand how to take a screenshot, start a game and press F-12 to take a snap. Exiting the game will display a Steam pop-up containing all the screenshots you've taken. You will be given the option to upload some or all of your screenshots to the Steam Cloud.
If you decide to upload your photos at this point, keep in mind that this would be your only chance to add captions to your screenshots. You will not be able to add titles to Steam screenshots once they have been uploaded to the Steam cloud.
Also, when uploading images to the Steam Cloud, you can choose whether they are private, visible only to friends, or visible to the public. Your screenshots will be available locally on your PC and on the Steam Cloud once you've uploaded your photos.
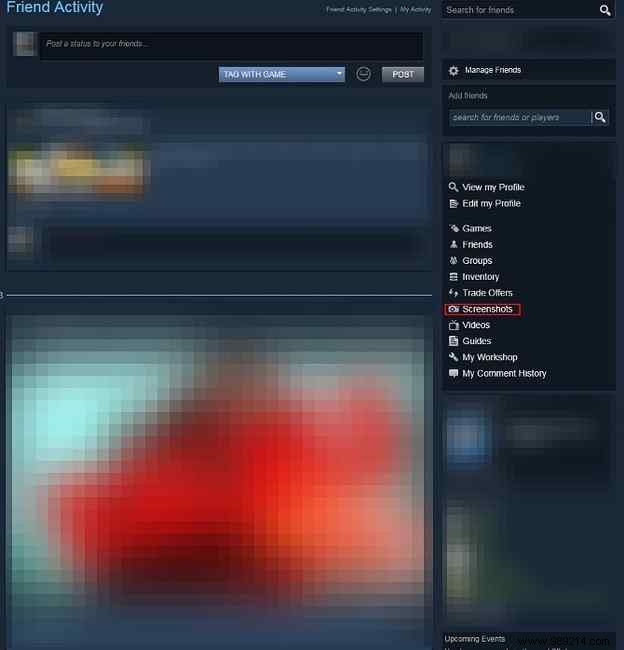
You can view your snapshots in the Steam Cloud by selecting your username and clicking Screenshots in the menu on the right of the screen. If you choose to delete or if you accidentally delete your locally saved Steam images, please note that you cannot re-download Steam screenshots to your local library.
Also, they will not contain your original date and time metadata. Instead, if you download a Steam screenshot from the cloud, it will appear as a JPEG in your images or downloads folder on your operating system. Finally, if you want to upload screenshots from a different game, simply select View Screenshot Library and Upload .
Your Steam Cloud has a 20 GB limit for screenshots. If you want to remove any of your Steam screenshots uploaded to the Steam Cloud, you can only do so one at a time. Finally, remember that you can see your Steam images uploaded pretty much anywhere.
Download: Steam for iOS | Android (free)
Screenshots created through third-party software cannot be uploaded natively to the Steam Cloud as each Steam screenshot is recorded within the text file, screenshots.vdf. This file can be found at Steam\Userdata\[unique user ID number]\760\remote\screenshots.vdf.
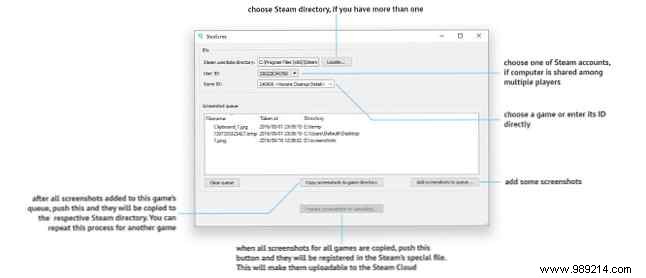
However, a free program called SteaScree solves this problem. SteaScree will make a backup copy of your local Steam screenshots.vdf file before your first use. However, it does not backup your Steam screenshots. Therefore, we recommend reading the following heading before trying SteaScree for absolute safety.
SteaScree provides excellent instructions on how to use the program. Once guided to the proper directories, SteaScree will access the photos you wish to upload to the Steam Cloud and correctly register them within the screenshots.vdf folder.
As a result, Steam will view these screenshots as your own and allow you to upload them to the Steam Cloud. You'll notice that the metadata attached to each screenshot will be from the time Steascree recorded it within the screenshots.vdf file.
Download: SteaScree for Windows | Macs | Linux (free)
Backup of locally saved Steam screenshots is also simple. On a PC, you must first find your Steam folder. Steam, by default, downloads to your Program Files (x86) binder. Once inside your Steam folder, navigate to User Data then your Username IDENTITY CARD binder.
the User IDs The folder is named with a unique numerical name that is linked to your account. Therefore, this folder has a different name for each user. However, since there is only one root folder inside the User Data Folder, it will be your only option..
Once inside your User ID folder, enter your 760 binder. Inside your 760 folder, open your remote binder. Once inside your remote folder, you will find numerous folders numerically. Each of these folders contains screenshots for the respective games and a folder with their corresponding thumbnails.
When it comes to creating a backup, I recommend copying and pasting weekly 760 folder to a dedicated USB flash drive. Even with thousands of screenshots, your 760 The folder will still take less than 10 GB of space.
Also, you can learn how to use programs that remotely back up your important files. Protect the files on your Mac with remote online backup. Protect your files on your Mac with remote online backup. to use an off-site backup. Read More With Carbonite or Backblaze, you can routinely choose to have your 760 automatic backup folder to the cloud weekly.
If you're interested in moving your Steam screenshot library to a new PC, it's extremely simple. All you have to do is download Steam and a single game to your new PC. Start the game and take a screenshot that you don't mind deleting. By taking a screenshot, you will have created a new 760 folder on your new PC.
Next, copy the 760 folder on your old PC to a flash drive. Finally replace the 760 folder on your new PC with the one on your flash drive. That's it! You have successfully moved your Steam screenshot library to a new PC. Also, Steam will still recognize which of the images have already been uploaded to the Steam Cloud. Steam recognizes photos correctly since their original screenshots.vdf file was transferred as part of their 760 folder.
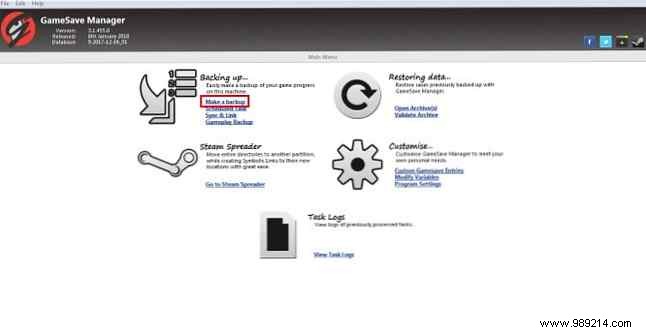
What should you do if you are trying to merge multiple Steam screenshot libraries from different PCs together on one computer? As long as the screenshots are from the same account, there is a way. GameSave Manager, a free and popular platform that backs up PC gaming content for hundreds of games, is also capable of creating a backup of your Steam screenshots.
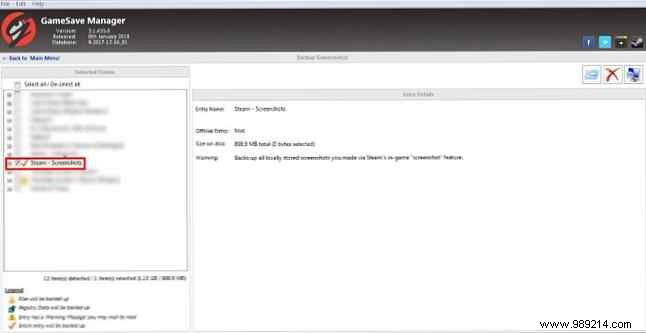
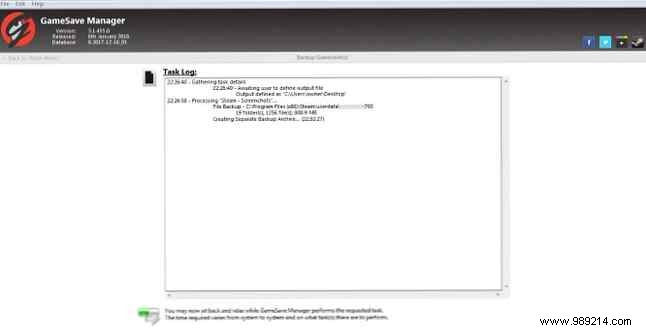
Once downloaded, the program is ready to run. There is no need to install GameSave Manager. Just select Make a backup , choose Steam Images from the list of options on the right side of the program. And give it time to back up your Steam photos to a special file.
Next, copy the file to a USB flash drive and install GameSave Manager on the PC you are also merging your screenshots on. Finally choose Restore backup On the PC you are moving the photos to. Select the moved file from your other computer.
Once the program finishes, you will have merged your screenshots on your PC. Since GameSave Manager plays nice with your screenshots.vdf file, Steam will still allow you to upload screenshots to the Steam Cloud. Also, Steam Cloud will recognize previously uploaded photos.
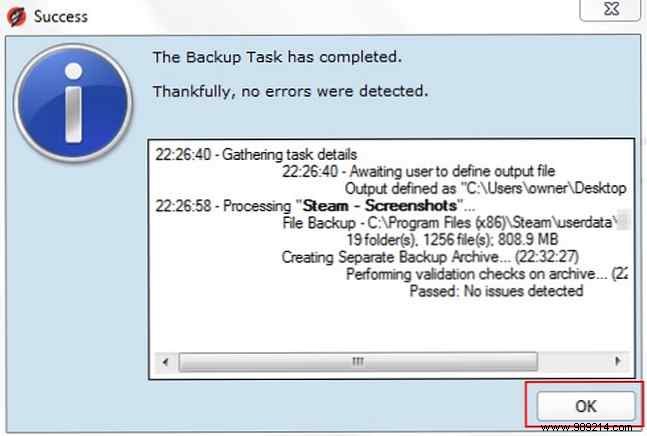
Using GameSave Manager will allow you to organize all your screenshots produced on multiple PCs on a single computer. As long as all photos are from the same Steam account..
Download: Gamesave Manager for Windows (Free)
This article should have helped you back up your Steam screenshots, and much more. However, there is more to Steam than just screenshots. So if your game collection is getting out of hand, here's how to organize your Steam library. The best way to organize your massive Steam library. The best way to organize your massive Steam library. If you have more games than you know what to do with, this free tool will help you control them. Read more.